Monday, 22 June 2009

Using Processing in NetBeans (6.5)

Boyd mentioned passing a reference to the current PApplet to separate classes from a Processing app. For anyone who has not yet tried combining Processing and NetBeans, points I have noted are here - there may be better alternatives. This post shows an example that implements a clipboard Copy and Paste subsystem. The code can be used in any processing application. Three variants are discussed: implementation as an inner class in a NetBeans (or PDE) environment, as a separate class in NetBeans and, using the resulting .jar from the Processing IDE (PDE). Initially a NetBeans Processing application is needed.

Creating a NetBeans Processing app.

1) In NetBeans make a New project, say 'Processing Template', with Create Main Class say 'processing.ProcessingApp'. (if you change the package name in the wizard, the package is created OK but the package processing; statement may be missing from the listing: just type it in)

2) Right click on the Libraries node in the project tree: Add JAR/folder, navigate to the folder where Processing core.jar is located, ...\processing-1.0.2-expert\ processing-1.0.2-expert\lib on my system. Select 'core.jar', and Open.

3) Modify the class ProcessingApp as shown:


package processing;

import processing.core.*;

/**
*
* @author Martin Humby
*/
public class ProcessingApp extends PApplet {

public static void main(String[] args) {
PApplet.main(new String[]{"processing.ProcessingApp"});
}

// Code that can optionally be copied to and compiled from the PDE goes here.
// The PDE only requires explicit import of packages it does not import
// implicitly: import java.awt.datatransfer and java.awt.image for the example
// below. Duplicating implicit imports is OK, for the standard imports
// that is. The PDE does not like public void setup() { } - delete public

} // end of ProcessingApp

Note that the string literal in main() must match the package name and class name. If you use Copy, Paste - Refactor to get a version copy and want to be able to run the copy, refactor does not modify the string and the new package and/or class-name must be changed by hand (otherwise the copy runs the current version of the original - confusing!).

To get a slightly more convenient way of accessing the library path to core.jar, select Tools - Libraries from the NetBeans menu bar. New Library, Library Name: 'Processing', Library Type: Class Libraries. Make sure Processing is selected in the Libraries tree and do Add JAR/Folder as in 2) above. Now right click the Libraries node for the project select Add Library. Scroll down the list of Global Libraries and select Processing.

Making the outline shown above a module template or plugin that can be installed into the IDE appears to have disadvantages. Seems to me the easiest way to keep a framework for Processing apps. handy is simply to save the outline as a standard project. Open the outline and use right-click Copy from the project node to get and rename a new project complete with the core.jar path already set up. You can of course include other Processing libraries with the outline.

Passing an explicit PApplet

An inner class that might be factored off to a separate class is a Clipboard Copy and Paste subsystem. Hiding its implementation means passing the current PApplet instance to its Copy and Paste functions. Writing subsystem access methods and the inner class as static ensures a separate class can be got with minimum modifications. Here the static keyword excludes passing an implicit this reference to the inner class: same situation as in a separate class. A difference is that enclosing class static fields remain accessible without qualification. Need to put this in if a straight transfer is going to work, (g.format == PApplet.ARGB) for example, or add such qualifications later.

To try this approach Copy the 'Processing Template' as a new project say 'Processing Clipboard' and modify the class ProcessingApp as shown. You can of course use Refactor to rename the class if you wish and modify the string in main() to suit.

package processing;

import java.awt.*;
import processing.core.*;
import java.awt.datatransfer.*;
import java.awt.image.BufferedImage;
import java.io.IOException;

/**
*
* @author Martin Humby
*/
public class ProcessingApp extends PApplet {

public static void main(String[] args) {
PApplet.main(new String[]{"processing.ProcessingApp"});
}

static final int WIDTH = 500;
static final int PANEL_HT = 160;
static final int HEIGHT = PANEL_HT + 500;
static final int DRAWING_HEIGHT = HEIGHT - PANEL_HT;
static final int PANEL_TOP = DRAWING_HEIGHT;

public void setup() {
size(WIDTH, HEIGHT);
background(255);

// include a panel below drawing area
fill(128);
rect(0, PANEL_TOP, WIDTH - 1, PANEL_HT - 1);
}

// draw() is required to get keyboard monitoring apparently
public void draw() {
}

public void keyReleased() {
// CTRL+C: Copy to Clipboard
if (key == 3) {
copyImageToClipboard(0, 0, width, height - PANEL_HT, this);
}

// CTRL+V: Paste Clipboard
if (key == 22) {
PImage img = getClipboardImage(this);
if (img == null)
return; // not an image on clipboard

// blank drawing area if required
background(255);

// paste image centred on area above panel
int w = img.width;
int h = img.height;
int dx = (width - w) / 2;
int dy = (height - PANEL_HT - h) / 2;
image(img, dx, dy);

// restore the panel area
fill(128);
rect(0, PANEL_TOP, WIDTH - 1, PANEL_HT - 1);
}
}

/////////////////////////////////////////////////////////////////////////////
//
// COPY AND PASTE SUBSYSTEM
//

/**
* Clipboard copy and paste: the following references were used
* http://processing.org/hacks/hacks:clipboard
* http://www.devx.com/Java/Article/22326/0/page/1 et seq.
*
*/

public static void copyImageToClipboard(int top, int left, int width,
int height, PApplet p) {

// could pass this.g directly but passing this for both functions gets
// consistency in use
PGraphics g = p.g;

// g is needed to get format
BufferedImage bImage = new BufferedImage(width, height,
(g.format == PApplet.ARGB) ?
BufferedImage.TYPE_INT_ARGB : BufferedImage.TYPE_INT_RGB);
g.loadPixels();

// some explicit identifiers clarify setRGB() usage:
// setRGB(bImageX, bImageY, bothW, bothH, source[], srcOffset, sourceW);
bImage.setRGB(0, 0, width, height, g.pixels, left + top * g.width, g.width);

TransferablePImage imageSelection = new TransferablePImage(bImage);
Toolkit.getDefaultToolkit().
getSystemClipboard().setContents(imageSelection, null);
}

// return a PImage rather than an awt.Image
public static PImage getClipboardImage(PApplet p) {

Transferable t =
Toolkit.getDefaultToolkit().getSystemClipboard().getContents(null);
try {
if (t != null && t.isDataFlavorSupported(DataFlavor.imageFlavor)) {
BufferedImage bimg = (BufferedImage)
t.getTransferData(DataFlavor.imageFlavor);
int w = bimg.getWidth();
int h = bimg.getHeight();

// make it ARGB to be on the safe side - makes no difference
// unless clipboard image has some tranparency could be?
PImage pImg = p.createImage(w, h, PApplet.ARGB);
pImg.loadPixels();
bimg.getRGB(0, 0, w, h, pImg.pixels, 0, w);
pImg.updatePixels();
return pImg;
}
} catch (UnsupportedFlavorException e) {
} catch (IOException e) {
}
return null;
}

static class TransferablePImage implements Transferable {

// the class-name makes more sense as a separate class
private Image image; // an awt.Image

public TransferablePImage(Image image) {
this.image = image;
}

public Object getTransferData(DataFlavor flavor)
throws UnsupportedFlavorException {
if (!flavor.equals(DataFlavor.imageFlavor)) {
throw new UnsupportedFlavorException(flavor);
}
return image;
}

public boolean isDataFlavorSupported(DataFlavor flavor) {
return flavor.equals(DataFlavor.imageFlavor);
}

public DataFlavor[] getTransferDataFlavors() {
// in some cases there may be more than one flavour?
return new DataFlavor[]{DataFlavor.imageFlavor};
}
}
} // end of ProcessingApp

To test it open say Paint and load an image. Copy a selection smaller than 500 x 500, and paste to the Processing app. Copy and paste it back to Paint - the white border now surrounds the pasted area.


Factoring off the Clipboard Subsystem

It is optional whether a separate TransferablePImage class is put in a new package but doing this will make life easier if you want to use it from the Processing IDE. Right click Source Packages - New - Java Package, 'utilities' then
utilities - New - Java Class - 'TransferablePImage'.

Copy the inner class to the new file and modify it copying the subsystem interface methods as static class methods:

package utilities;

import java.awt.*;
import java.awt.datatransfer.*;
import java.awt.image.BufferedImage;
import java.io.IOException;
import processing.core.*;

/**
* Copy or paste Processing PImage to / from system clipboard
*
* @author Martin Humby
*/
public class TransferablePImage implements Transferable{

private Image image;

public TransferablePImage(Image image) {
this.image = image;
}

// static methods now part of class

public static void copyImageToClipboard(int top, int left, int width,
int height, PApplet p) {

... body as inner class

}

public static PImage getClipboardImage(PApplet p) {

... body as inner class

}

... other methods as inner class
}


To test the new class make a copy of ProcessingApp, say ProcessingApp1, using copy and paste to the processing package. Do not forget to change the class name in the string literal! Add import utilities.TransferablePImage; Delete the COPY AND PASTE SUBSYSTEM. Modify lines that call Copy and Paste to:

TransferablePImage.copyImageToClipboard(0, 0, width, height - PANEL_HT, this);

PImage img = TransferablePImage.getClipboardImage(this);

Optionally delete ProcessingApp1 imports that are no longer used and proceed as before.


Using TransferablePImage from the PDE

Create a new NetBeans project 'processing utilities' with Create Main Class unchecked. Fix up the libraries path to core.jar. Copy and Paste the utilities package from its current location to the new project's Source Packages node. Build the project: the location of the resulting processing_utilities.jar file is shown in the NetBeans Output window.

Make a new folder called maybe 'jars'. A good place could be in the default My Docments\Processing folder. Copy the processing_utilities.jar file to the new folder. Open the Processing IDE and make a new Sketch. Copy in the code from ProcessingApp1.java from after the main() method. Do not include the last curly bracket that belongs to the enclosing class. Delete public from the setup() method.

From the PDE menu bar select Sketch - Add File... navigate to the 'jars' folder and open processing_utilities.jar. The IDE reports 'One file added to the sketch.' No import statement is required and putting one in gets a compilation error. Run the sketch - the result should be identical to the NetBeans version. You can of course include several other classes in processing_utilities.

For more on this subject see http://dev.processing.org/libraries/


Summary

Most code that compiles in the Processing IDE will compile in NetBeans with a PApplet wrapper and fixed up imports. There are a few exceptions. The non-Java color data type is an integer and needs changing to int. A second minor but annoying problem is the fact that Java has the default type for floating point as double. Processing makes the type implied but overflow checked on compile (neither check for values effectively zero apparently).

Processing: float h = 4.13566733e-15; Java: float h = 4.13566733e-15f; Compiler simplicity maybe but after inserting a few dozen 'f's you begin to wonder whether it generates float g = 42; as a promotion. Java of course insists that PApplet methods that get overridden have the same public access as in PApplet but adding this is trivial.

Similarly, most code that will compile in NetBeans compiles in the PDE. To avoid problems particularly when there are errors in the code, delete public access for setup(). Processing is perfectly happy with anonymous classes, which may save a few lines of code here and there. Currently generics are not supported. A pity. I like Java generics. They seem to fit nicely with the object model without providing a sledgehammer capability for wholesale obfuscation. Of course, this opinion may be a reaction to an excess of _traits and spiky brackets elsewhere but generics could be useful to reduce code size in some applications. A set of minimalistic controls managed and drawn by Processing for example:


There is little problem implementing a tiny control management subsystem using a state machine: there are less than a dozen states for a complete set and some can be excluded - no drag and drop for example. Similarly, a single Control type with action and graphics closures, implemented as classes and assigned to its attributes on a mix and match basis, keeps coding to a minimum. Controls manage themselves for radio-button selection and which control gets input (focus). Problems come up when programmatic access to a control is needed - to modify text in controls that show drawing status and size for example.

Arguably this is the wrong way to do it. Perhaps closures should monitor status in the wider environment of the enclosing PApplet but doing this means that controls that can otherwise be entirely passive require a specific action closure or active graphic to do the monitoring. A single line of code, in the draw() function say, can modify a passive control. Alternatively a new closure class is required to implement monitoring.

Control action and graphic attributes are coresponding base classes. Access to a specific attribute means either retaining a reference to the control and casting attributes to their actual type or retaining a reference to the attribute itself. Neither way is ideal as far as code size and clarity goes. Generics can do the casting once for a control reference and all specific attribute types are then accessible directly through that reference. There must be other situations where using generics from the PDE could be useful.

Tuesday, 28 April 2009

Chunk 37 Outline

Next step to apply abstraction and functional approach to drawing lines with special properties.

Characteristics of line: start, end points and path between. Anything can happen along line as random or other factors are applied to it.

Underlying path across a grid of pixels and problems drawing it: Bresenham's algorithm.

Abstracting error-value checking to a closure - simple implementation, optimization.

Writing a function to draw a line between any two points, any width with a colour gradient along its length: needs end points of lines normal to conceptual underlying line.

Writing another closure to return maximum-width end-points of lines at points along underlying length. Problem: filling in missing pixels between adjacent lines due to jagged profile when they offset along underlying line.

Program draws colour gradient lines.

Applying similar closure approach to diverse grids: circular and random spaced grid using array.

PROGRAM 3D grid and thistle-down blob drawn with colour grad lines, moves along its length.

Mostly code: say 48 hours work, 2 weeks max. Time to post code on blogger????

Thursday, 9 April 2009

In Search of Processings Lost

As you may have noticed, Processing programs that use random() and/or noise() and do not set the seed for these functions before they are called, create a different output for each run. The run that gets the superb effect is lost forever but setting seeds always gets the same old effect as the last time. To retain random creation and the capability of recreating a successful run it would nice if the value of seeds could be read at the beginning of a run and stored for future reference. Unfortunately this is not possible - the underlying Java Random class sets seed randomly from its () constructor and does not include a method for retrieving a value that can be used with setSeed().

A workaround is to generate a value for seed using a similar procedure to Random's, record it, and then pass it to a seed setter:


void setup() {
size(WIDTH, HEIGHT);
long seed = 8682522807148013L + System.nanoTime();
System.out.println(seed);
randomSeed(seed);
doDrawing();
}

output: 8702777365341749

If this run turns out to be the great one change setup() to

void setup() {
size(WIDTH, HEIGHT);
// long seed = 8682522807148013L + System.nanoTime();
// System.out.println(seed);
randomSeed(8702777365341749L);
doDrawing();
}

identical graphic output is recreated. Otherwise, just continue with the original setup() version and hope for the best. The same seed generation method is appropriate for noiseSeed(). The seed calculation shown will avoid holes in the total sequence of values returned by nextLong() - if such exist and affect the 48 bit seed used by Random that is.

Thursday, 26 March 2009

Drawing with Lines

This Chapter examines the nature of lines and how they can be used to create art using the line drawing facilities provided by Processing. Initially we look at the broadest possible description of a line and then get down to the nitty-gritty of making a program produce a required result by drawing lines.

Not all lines are straight. A geodesic, the shortest distance between two points on the surface of the Earth, is a curve. Add random noise to a line and it can take on an aspect of a lightning strike, flickering flames, a rough sea, rain falling on a lake and other representations of chaotic behaviour or liquid flow according to the frequencies present in the noise. Any kind of line, straight, curved or distorted, can suggest an edge, a boundary or a link between two locations.

Alternatively we may want a simplified view where the purity of straight lines or the intersections of many lines are used to represent underlying curvature or some more complex shape. A grid of lines can define a two or three dimensional space where equal spacing represents the world as we see it but other spacings can give the effect of non-linearity. We can show distances and dimensions that would otherwise be too small or too large to see. We can also employ the additional dimensions of light, colour, hardness, discontinuity (dots and dashes) and blur to achieve the effect we want.

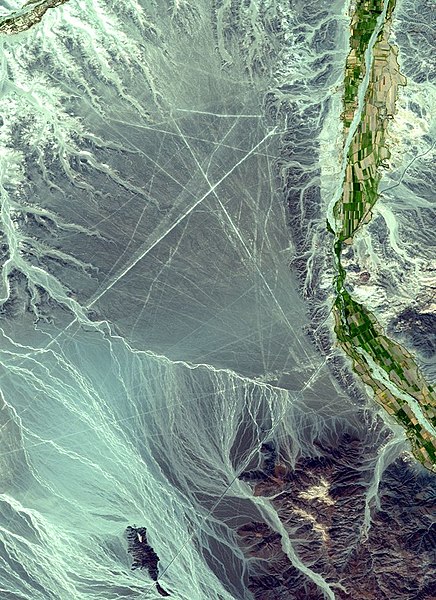
There are few straight lines in nature and even fewer orthogonal straight lines. A straight line has its own special significance when used representationally. An icon of human-kind one might say.


Satelight image of the nazca lines
from Wikimedia Commons NASA/GSFC/MITI/ERSDAC/JAROS, and U.S./Japan ASTER Science Team


The Line Drawing Functions

Having got to grips with coordinates, setting colours and suchlike you will probably find line drawing relatively simple. Unlike some less enlightened environments Processing has only a single line drawing function and three line attribute setters.

The line() function

Line(), is overloaded for drawing in 2D and in 3D. A line function with four arguments draws a line on the picture plane, the screen for current purposes.
   line(x1, y1, x2, y2)

draws a line from the point (x1, y1) to (x2, y2).

To draw in 3D we must first setup a 3D drawing environment. Two 3D environments are available and as detailed in XXXX they are invoked by passing an extra argument to the function that sets the window size at the start of the program. You can use either


  size(x, y, P3D);   or   size(x, y, OPENGL);
size() can also be called with a P2D argument to get faster 2D drawing than the default JAVA2D environment provides: size(x, y, P2D). At the time of writing P2D did not support all the facilities of the default mode for line drawing. Try its effect using the simple line drawing program we come to in a moment and check the line drawing and attribute setter functions on the Processing website for current details.

With a 3D environment in place use:
  line(x1, y1, z1, x2, y2, z2);
to draw a line between points (1) and (2) in three dimensional space. The extra coordinates z1 and z2 are the distances of points behind the picture plane. Their depth back from the front face of the screen is another way of thinking about it. If a line is located behind the picture plane and/or tilted in the depth dimension, it will be shown shorter than its length drawn flat on the screen.

The line() functions accept floating point values and can be called with floating point or integer coordinates. Fractional values are rounded to the nearest pixel but casting arguments to integer can be sometimes be useful to smooth jagged parallel line endings e.g:

   line(floatX1, floatY1, (int)floatX2, (int)floatY2); // smooth endings at X2, Y2


Line attribute setters

Three functions set the 'style' of the line that will be drawn by the next and subsequent calls to line(). The effect of calling any one of these functions remains in place until the same function is called again. To be able to revert to a previous value we need to make sure the old values are stored. Line style setters and many other functions that modify the drawing environment have a corresponding variable in the current instance of the Processing application interface, called 'g'. To store the current line colour, for example, we can write
  int oldColour =  g.strokeColor.
Accessing variables using 'dot' notation is discussed later, particularly in Chapter ZZ: Object Oriented Programming. To revert to the old colour write
  stroke(oldColour);
The facility to store and to revert to old settings allows a section of code or a function to draw using settings applicable to the task in hand and restore old settings afterwards - an aid to abstraction discussed later in this Chapter in connection with parametric graphics.

The stroke() line colour setter accepts the same colour and alpha opacity values as the other Processing colour setters detailed earlier in XXXXX. Two other setters affect line drawing: strokeWeight() sets line thickness, strokeCap() the shape or relative location of the end of a line. The program in Listing CC.1 demonstrates the effect of the line style setters.


/* set window size and drawing environment */

// declaring constants static final makes sure they
// cannot be altered by mistake later in the program
static final int WIDTH = 200;
static final int HEIGHT = 200;
static final int OS = 20; // lines offset from edges

void setup() {
// size(WIDTH, HEIGHT, P2D);
// PD2 mode not fully functional in Processing 1.0.2
// so use:
size(WIDTH, HEIGHT);
}

/* draw in continuous mode */
void draw() {
// fill the window with charcoal grey
background(0.25 * 255);

/* draw a 45 deg line top-right to bottom-left */
// set line colour to greyscale white
stroke(255);
// set line width to 12 pixels
strokeWeight(15);
// make the ends of the line squared off
strokeCap(SQUARE);
// draw the line
line(WIDTH - 2*OS, 2*OS, 2*OS, HEIGHT - 2*OS);

/* draw two lines same length, parallel to it */
// rounded ends
strokeCap(ROUND);

/* draw a red line 20 pixels wide above */
strokeWeight(23);
stroke(255, 0, 0); // colour red
line(WIDTH - 3*OS, OS, OS, HEIGHT - 3*OS);

/* draw a green line 20 pixels wide below */
stroke(0, 255, 0); // colour green
line(WIDTH - OS, 3*OS, 3*OS, HEIGHT - OS);

/* draw a blue line 50% opaque, width 20,
top-left to the mouse cursor */
stroke(25, 25, 255, 255 / 2);
strokeWeight(25);
// extend line past cursor point
strokeCap(PROJECT);
line(30, 30, mouseX, mouseY);
}

Listing CC.1


Figure CC.2 Listing CC.1 running.


Running the program note the effect of the attribute setter functions strokeWeight() and strokeCap() for changing line thickness and the shape or relative location of the end of a line as shown in Figure CC.1. Use the mouse to move the blue line over the other lines and note alpha transparency generally and where the lines intersect. Graphics behind an area of transparent colour may appear lighter or darker according to relative brightness values. Try changing the blue line to white, stroke(255, 255, 255, 255 / 2); colours behind are now lightened.

Parametric Grids


The effect of drawing a single line tends to be minimal and it is more likely that many lines will be needed to produce a required effect. In this section we look at a strategy for doing this that extends the repetition facility provided by loops.

Another name for arguments is parameters and parametric graphics is a common feature of vector graphics applications. Using this approach a drawing task is abstracted (taken out) from the main part of the program and done by passing arguments to a function that draws the graphic. Many similar objects can be drawn with different sizes, locations, colours, and other properties determined by values passed to arguments.

Initially we experiment with parametric grids and to do this with a minimum of work the initial step is to set up a basic grid drawing program for testing them out. Optionally the basic structure can be extended to produce actual drawings that include grids. Listing CC.2 shows the outline:


/* set window size and drawing environment */

static final int WIDTH = 900;
static final int HEIGHT = 600;

void setup() {
size(WIDTH, HEIGHT); // default environment
doDrawing();
}

/* draw the drawing */

void doDrawing() {
// charcole grey background, again!
background(0.25 * 255);
// white grid lines
stroke(255);
// one pixel wide
strokeWeight(1);

// draw a grid with number of cells xCells * yCells
int xCells = 13;
int yCells = 19;
drawGrid(0, 0, WIDTH, HEIGHT, xCells, yCells, true);

}

void drawGrid(int left, int top, int width, int height, int xCells,
int yCells, boolean drawOutline){

}

Listing CC.2


As it stands the outline will compile and run but does nothing except opening a window with a grey background. Sections of functionality will be factored off using calls to drawGrid()to draw as many different grids as we require. Such power should be used carefully so the first thing is to decide exactly what we want a drawGrid() function to do and make sure all drawGrids variations we write do just that.

Arguments left and top are where the top-left corner of the grid will be positioned. Width and height specify the size of the grid in pixels, xCells and yCells the number of areas the grid is divided into in the horizontal and vertical directions respectively. Cells are to be made to fit the grid exactly by distributing any odd pixels evenly across cell widths and heights. If draw outline is passed true a one pixel wide line is to be drawn around the grid within the size given. All this sounds complicated but is actually very easy when we divide up the work using functions.

Drawing grids in 2D


The code for a 2D drawGrid() can be something like this:

void drawGrid(int left, int top, int width, int height, int xCells,
int yCells, boolean drawOutline){

// precondition for drawing the grid
if (width <= 0 || height <= 0) return;

// compute the coordinates of the rightmost an bottom pixels
int right = left + width - 1;
int bottom = top + height - 1;

// draw the grid
drawVertGrid(left, top, right, bottom, width, xCells);
drawHorzGrid(left, top, right, bottom, height, yCells);

if (drawOutline){
// save current line width
float curWeight = g.strokeWeight;
// draw outline with a line 1 pixel wide
strokeWeight(1);
line(left, top, right, top);
line(right, top, right, bottom);
line(right, bottom, left, bottom);
line(left, bottom, left, top);
// restore line width
strokeWeight(curWeight);
}
}
Listing CC.3

Preconditions for execution

Writing functions it is wise to check that all possible values passed as arguments can be dealt with by the code in the function body. What happens, for example, if drawGrid() is called with zero or negative dimensions passed to width and/or height?

If we see there is a problem a number of options are available. In this case a fully justifiable option is to simply ignore it. We are not trying to create a flawless machine and an emergent property of a program may turn out to be a spectacular work of art. On the other hand, if the code simply does not work a lot of time can be wasted trying to track down the bug.

Another option is to pass the problem on to other functions. Perhaps the grid will be drawn with all or part of it off the screen. This eventuality can be passed on for line() to deal with.

The third option is to write code at the start of the function that checks input is within range. These checks are known as preconditions: execution of other code in the function body is conditional on the checks being passed. There are three ways of dealing with a failed precondition: the function can return immediately to the caller; likewise but it returns a Boolean or some other value indicating success or failure; alternatively an error condition can be created. Java error conditions are dealt with by throwing and catching exception objects, certainly beyond the scope of this Chapter. For drawing grids a simple conditional return statement is appropriate:
      if (width <= 0 || height <= 0) return;

Note that other problems such as zero or negative numbers of cells are passed on to the grid-line drawing functions.

Minimizing coding

Another useful strategy is to avoid writing code that does the same thing more than once. This makes the code run faster but more importantly can make it shorter and easier to read. We are going to draw numerous lines from the left to the right of the grid and from its top to the bottom so compute right and bottom before doing anything else:
      int right = left + width - 1;
int bottom = top + height - 1;


The next task is to draw the gridlines, done by two functions:
      drawVertGrid(left, top, width, bottom, xCells, constrain);
drawHorzGrid(left, top, right, height, yCells, constrain);
Finally a one pixel wide outline is drawn around the grid if this option is set having first saved the current line thickness, as shown in Listing CC.3. Drawing the outline, and in calls to the drawing functions, the values of right and bottom computed on entry save numerous calculations.

So, you may be thinking, if working out this stuff early is such a good thing why not do it in the doDrawing() function, pass these values to drawGrid()and maybe make some savings in other functions called from doDrawing()? There are a few reasons for not doing this but the most important relates to abstraction. Working in doDrawing() we should not have to consider the needs of drawGrid() or any other functions called, only what they can do to get the drawing done in terms of the size, shape and location of the objects drawn.

Drawing uniform cells

The tasks to be done by the grid-line drawing functions are: check preconditions, compute cell size, initialise the drawing position to the first grid line and finally, loop while the drawing position is less than the last pixel, drawing each grid line and incrementing position by cell size. Coding these tasks to draw vertical grid lines gets:


void drawVertGrid(int left, int top, int right, int bottom, int width,
int xCells){

// precondition: if negative or zero cells exit now
if (xCells <= 0) return;

// compute cell width
float cellWidth = (float)width / xCells;

if (cellWidth < 1)
cellWidth = 1:

for (float x = left + cellWidth; x < right; x += cellWidth){

// x is the x-coordinate of the vertical line drawn in the window
line(x, top, x, bottom);
}
}


There are two points to watch out for computing cellWidth. The first one is division by zero. Java and Processing allow division by zero for floating point calculations without throwing a fit but an INFINITY result is usually best avoided (do it with integers and a divide by zero exception is thrown). In this case a zero divisor has already been excluded by the precondition: xCells must be greater than zero. Negative and zero values for width were excluded by drawGrid() making certain that cellWidth is positive. If cellWidth was zero or negative adding it to x in the loop would never make x equal to or greater than right and the loop would not exit.

Writing mission critical software - perhaps designed to avoid crashing our lauch vehicle in a nearby swamp or bringing a spacecraft to a perfect landing two miles below the surface - it would be wise to do similar checks in both the caller and the called function. As things stand a single check will do nicely. Excluding a negative value for xCells in drawVertGrid() rather than drawGrid() includes the option that other versions of drawVertGrid() will process such values to get a particular visual effect.

The second point is that Java’s multipurpose division operator returns an integer result when both operands are integers. The drawGrid() specification requires that cells fit the grid. To make this work, cell dimensions need to be floating point values so that when added together fractions of a pixel periodically add up to a whole one. The integer argument width is typecast to(float) getting a floating point result complete with any fractional part. Lastly, if cellWidth is purely fractional, the entire grid will consist of minutely overlapping lines and may take a while to draw. In this case cell width is set to unity.


The drawing loop


Using a for loop keeps lines of code to a minimum. You will recollect that the format of a for loop is generally:

for (initialize loop variable;
condition for entering or re-entering the loop;
action to be done at the end of each pass through the loop){

// stuff to be done in the loop goes here

} // end of the loop

At the start of the loop a line at the left of the grid is not required so the loop variable x is declared and initialised to draw the first line at left + cellWidth . Declaring the loop variable in the loop declaration makes it accessible only within the loop, a safety advantage over a while loop in many cases because its value after exit can be somewhat obscure.

Java for loops are not the simple counting loops seen in some other languages. Basically a for loop provides a concise way of writing a while loop by filling in the items inside the round brackets. Ideally the condition for entry or re-entry should specify a range of loop variable values that allows access to the loop - not a single value that when reached by incrementing or decrementing the variable terminates looping: loop while x != right; x += cellWidth, for example. Using an inequality exit condition there is a danger that x will be initialized greater than right permitting unplanned entry or that, due to a fractional initial value and/or an increment greater than or smaller than unity, x steps over an assumed exit value. Result: the loop loops-for-ever. The condition x < right avoids these problems.

The last part of the for loop declaration is executed after each pass through the loop. Here it adds cellWidth to the loop variable using the shorthand += operator to take it to the coordinate of the next grid line (approximately). In this case 'stuff to be done in the loop' is simply to draw the current line going top to bottom. The function that draws horizontal grid lines is similar:

void drawHorzGrid(int left, int top, int right, int bottom, int height,
int yCells){

// precondition: if negative or zero cells exit now
if (yCells <= 0) return;

// compute cell height
float cellHeight = (float)height / yCells;
if (cellHeight < 1)
cellHeight = 1;

for (float y = top + cellHeight; y < bottom; y += cellHeight){

// y is the y-coordinate of the horizontal line drawn in the window
line(left, y, right, y);
}
}